nicholas90.homelinked.tech ← home
HKSTP · Building 19W, Science Park Beginner-friendly guide Read before your first visit

The Robotics Catalysing Centre,
a maker's workshop, explained for first-timers.

The RCC is HKSTP's build-it-yourself lab: 3D printers, laser and waterjet cutters, a full metal workshop, an industrial robot arm, and an electronics bench. This is a plain-language walk through the machines we've seen in person — what each does, what to know before you use it, and how it helps build Innospire's AI glasses. No experience needed.

14
tools & machines, in 5 areas
6
3D printers on site
Build
a lab for making, not testing
Members
access after safety training
Orientation

A quick look inside

The RCC (Robotics Catalysing Centre) sits at Building 19W. It's split into a fabrication workshop (the machines below) and open assembly benches where members build and test their prototypes.

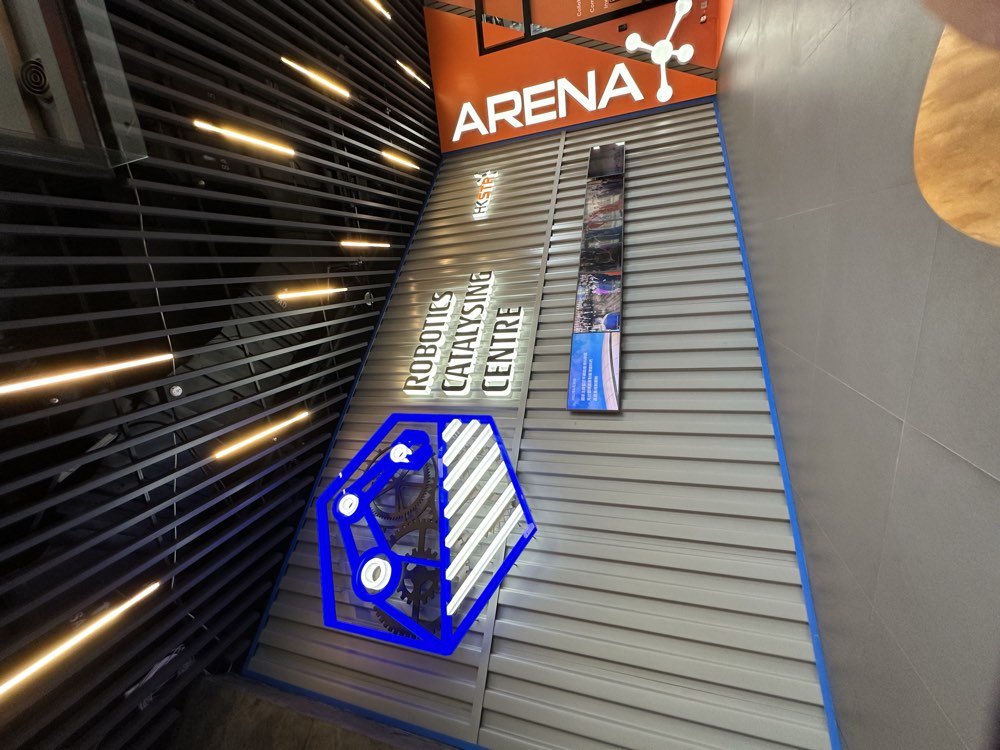
Robotics Catalysing Centre entrance sign
The entrance — the RCC and its ARENA event space at Building 19W, Hong Kong Science Park.
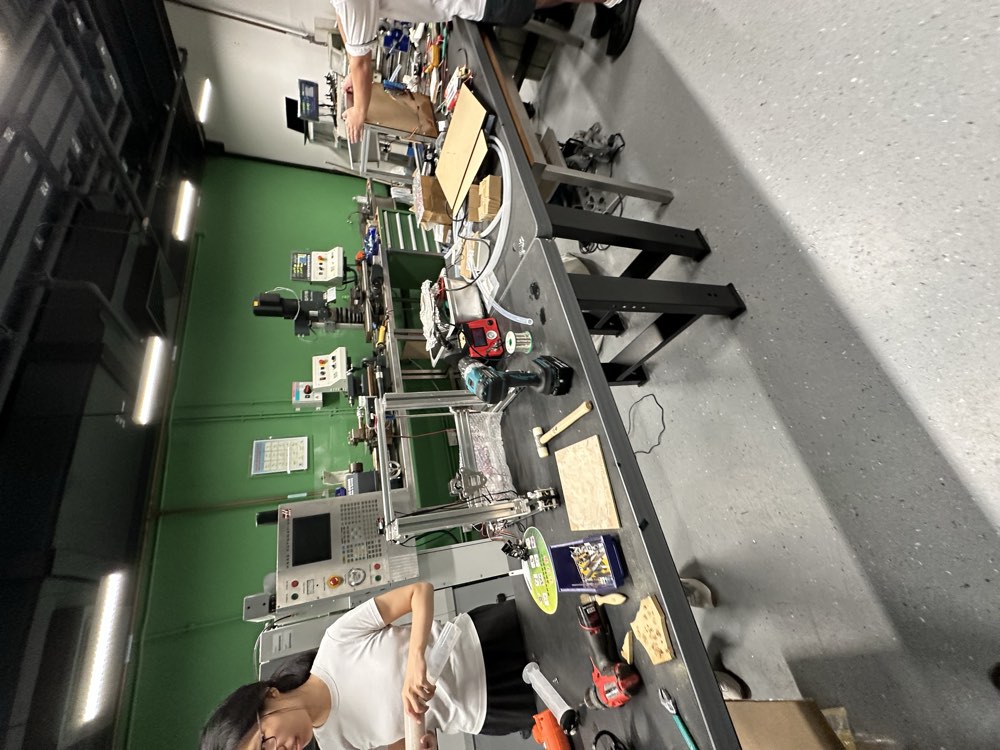
Assembly workbenches with people building prototypes
Assembly benches — large open workbenches where members build, wire, and test their prototypes.
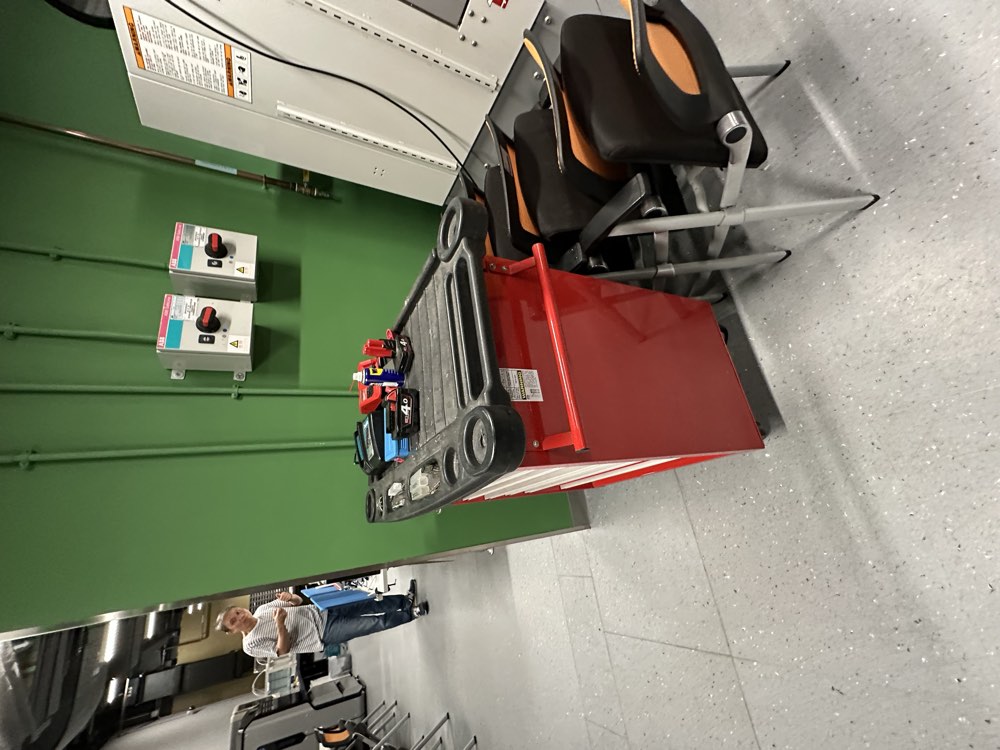
Rolling tool chest with power tools
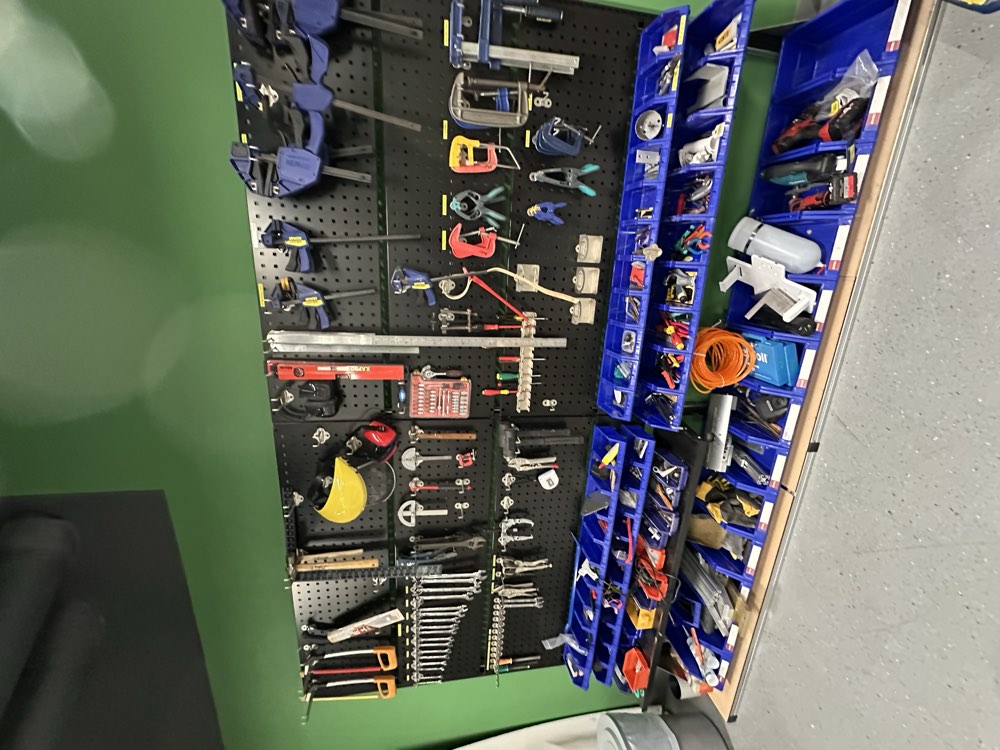
Shared tools — rolling tool chests and cordless power tools members can borrow around the shop.
How access works

How you get to use it

Unlike a testing lab, the RCC is a hands-on workshop. Members do the making themselves once they're trained, and the centre's technical team is there to train you and help fabricate parts.

Self-service You make it yourself

Members only · safety training / induction required

Once you're a member and have done the required safety training for a machine, you book it and operate it yourself. Hand tools can be borrowed around the shop.

Best for: iterating on your own parts quickly — printing, cutting, machining, soldering, and assembling.

Technical support The team helps you

Training · fabrication service · robotics support

RCC technicians run the safety training, can fabricate parts for you, and give robotics and prototyping technical support when a job is beyond your own skills or clearance.

Best for: getting trained, or handing off a tricky machining job to an expert.

The RCC doesn't publish prices online. For membership, training and rates, contact rcc.info@hkstp.org or +852 2629 6918 (Mon–Fri, 09:00–18:00).

The machines

The 14 tools & machines, one by one

Each card tells you the brand and model, what the machine does in plain words, what to know before you use it, and how useful it is for building our AI glasses. Only equipment we've photographed in person is listed here — the RCC has more.

Core — we'd use this directly to build the glasses
Situational — useful for jigs, fixtures, or one-off needs
Not needed — made for heavier or different work
STATION 01

Design & CAD

Where every project starts: professional software to draw the 3D shape and lay out the circuit board.

1 itemSelf-service
Software suite SolidWorks · AutoCAD · Rhino · Altium · SolidCAM · Adobe CC01
Core for the glasses Self-service · training may be required

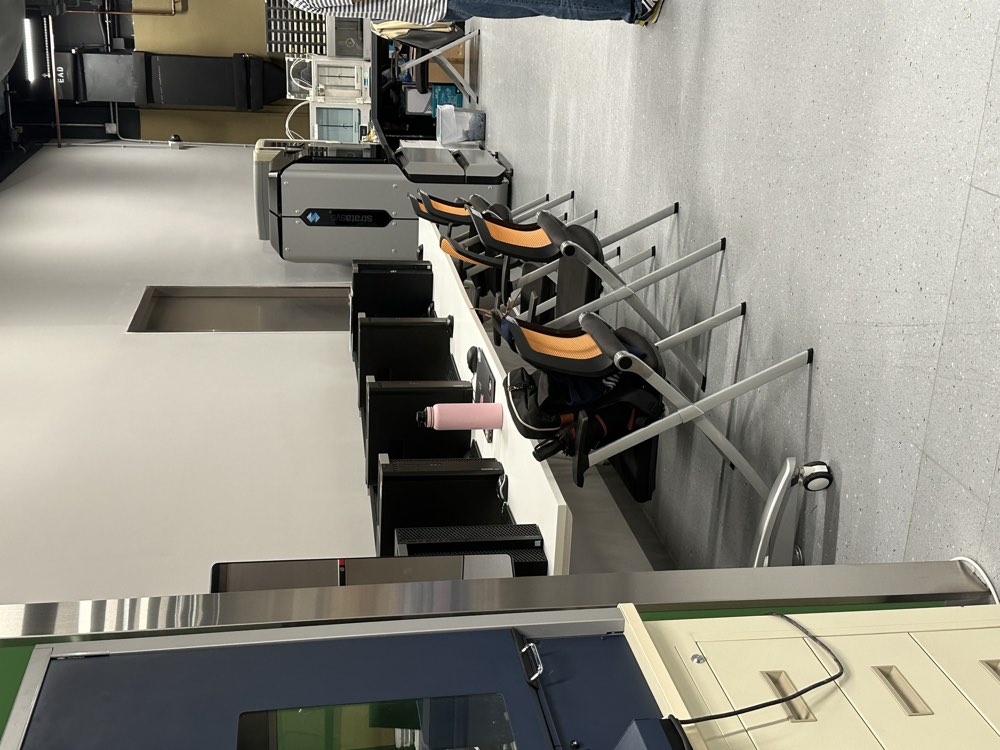
CAD / CAM Workstations

Software suite  ·  SolidWorks · AutoCAD · Rhino · Altium · SolidCAM · Adobe CC

Computers loaded with professional design software. SolidWorks and Rhino for 3D shapes, Altium for the electronics board, SolidCAM to turn a design into instructions the cutting machines can follow.

For the glassesWhere the glasses begin — design the frame in 3D and lay out the circuit board.
🛡 Safety & PPENo hazards — just book a seat. Save your work to your own drive and don't leave files on the shared machine.
🧰 What to prepareYour sketches, measurements, or reference files, and a clear idea of which program you need.
💡 In plain wordsCAD means 'computer-aided design' — drawing a part on screen, precisely, before you make it real.
STATION 02

3D printing

Turn a design into a real plastic part you can hold, wear, and check the fit of — often overnight.

1 itemSelf-service
Stratasys · Ultimaker · Markforged F370, Objet500 Connex3, uPrint SE Plus, Ultimaker 3 Extended, S5, Onyx Pro02
Core for the glasses Self-service · training may be required

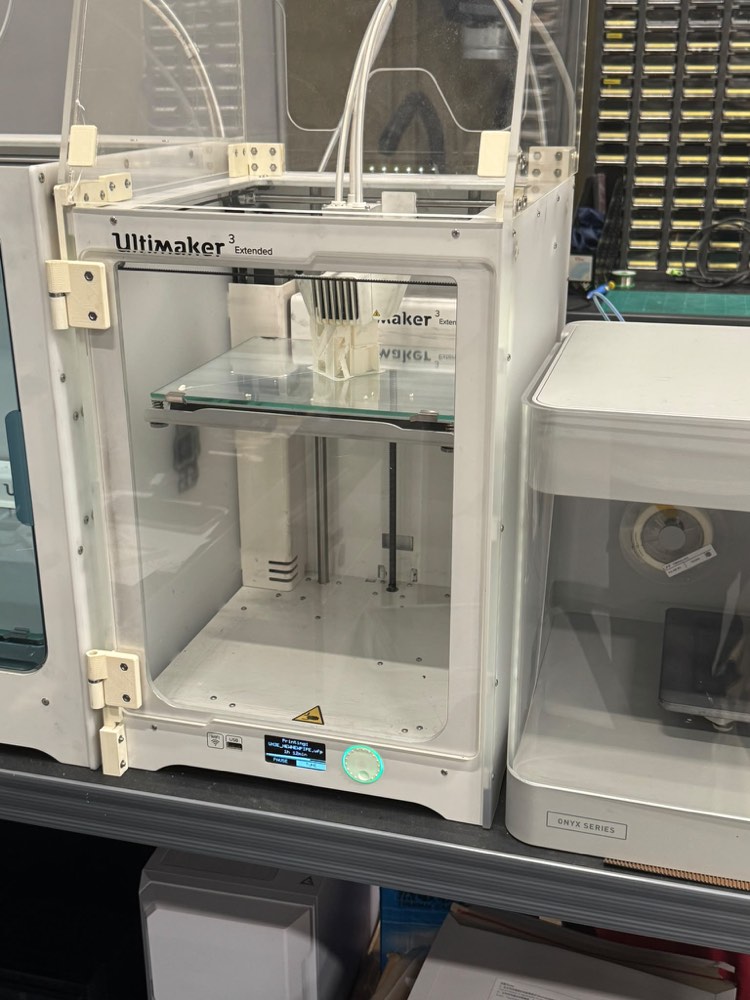
3D Printer Fleet

Stratasys · Ultimaker · Markforged  ·  F370, Objet500 Connex3, uPrint SE Plus, Ultimaker 3 Extended, S5, Onyx Pro

Six printers that build plastic parts layer by layer from your 3D file: everyday plastic (Ultimaker, Stratasys), smooth multi-material models (Objet500), and tough carbon-reinforced parts (Markforged Onyx).

For the glassesPrint a real frame or housing overnight, then hold it, wear it, and check the fit.
🛡 Safety & PPENozzles and beds get hot — don't reach inside during a print. Some materials need good ventilation.
🧰 What to prepareA finished 3D file (STL or STEP) and your choice of material. Start long prints early in the day.
💡 In plain words3D printing 'grows' a solid part from the bottom up, so a design on screen becomes a real object you can hold the next morning.
STATION 03

Cutting & shaping

Machines that cut flat sheets or thick blocks into precise shapes.

2 itemsSelf-service
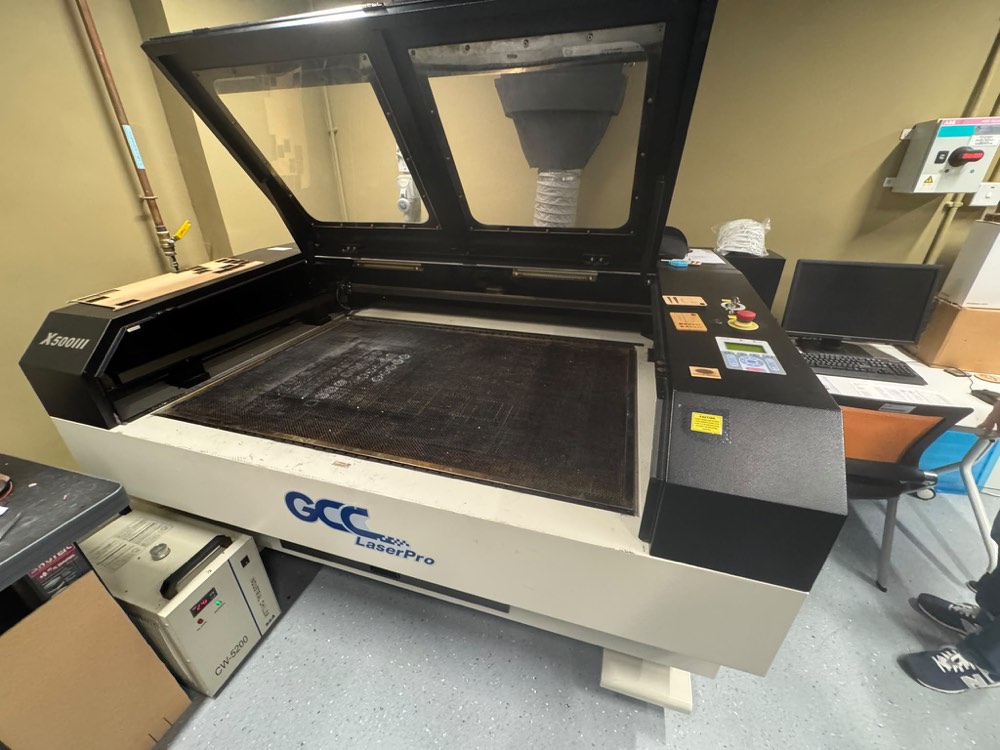
GCC LaserPro X500III03
Situational Self-service · training may be required

Laser Cutter

GCC LaserPro  ·  X500III

A laser that cuts and engraves flat sheets (acrylic, wood, card) with a very fine, clean edge.

For the glassesCut flat acrylic or card parts — jigs, spacers, and neat packaging mock-ups.
🛡 Safety & PPENever leave it running unattended — fire risk. Only cut approved materials; some plastics give off toxic fumes. The extraction fan must be on.
🧰 What to prepareA flat vector drawing (lines to cut) and a sheet of an allowed material.
💡 In plain wordsThe laser burns a thin line exactly along your drawing — perfect for flat shapes.
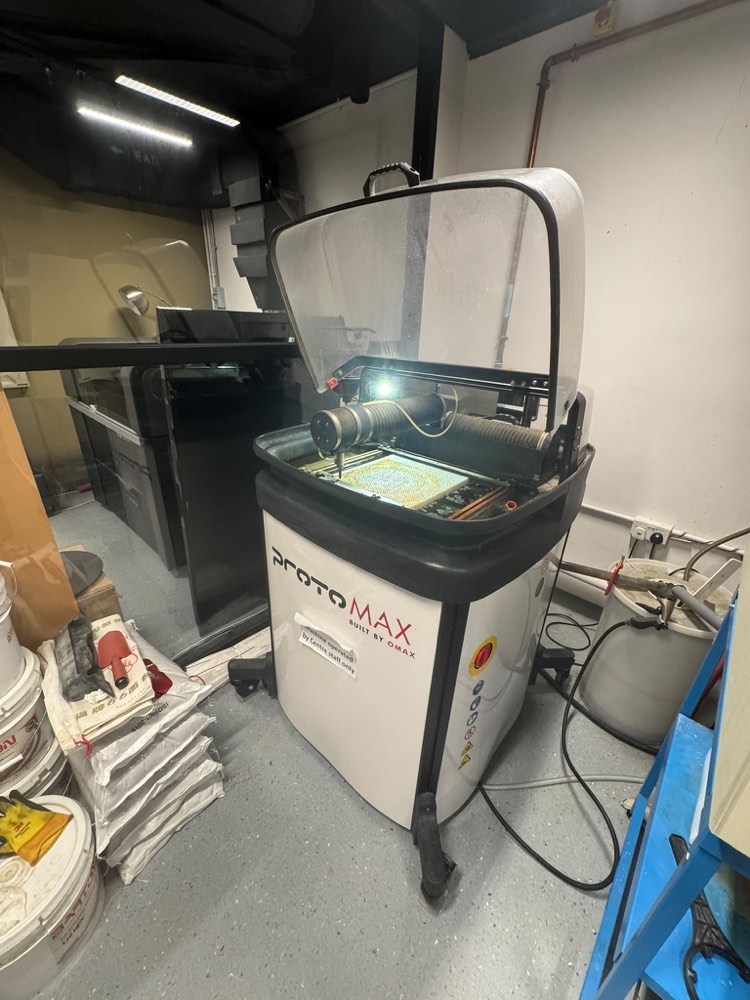
OMAX ProtoMAX04
Not needed for the glasses Self-service · training may be required

Waterjet Cutter

OMAX  ·  ProtoMAX

Cuts thick, hard materials (metal, stone) using a high-pressure jet of water mixed with fine sand.

For the glassesBuilt for thick metal and hard materials — far heavier than a small plastic wearable needs.
🛡 Safety & PPEExtremely high-pressure water. Staff induction required; keep hands well clear; eye and ear protection.
🧰 What to prepareA flat cut file and a material the machine supports.
💡 In plain wordsA super-fast stream of water and grit slices through metal — without any heat.
STATION 04

Machining & robotics

Heavier workshop machines for shaping metal, plus the centre's signature industrial robot arm.

8 itemsSelf-service
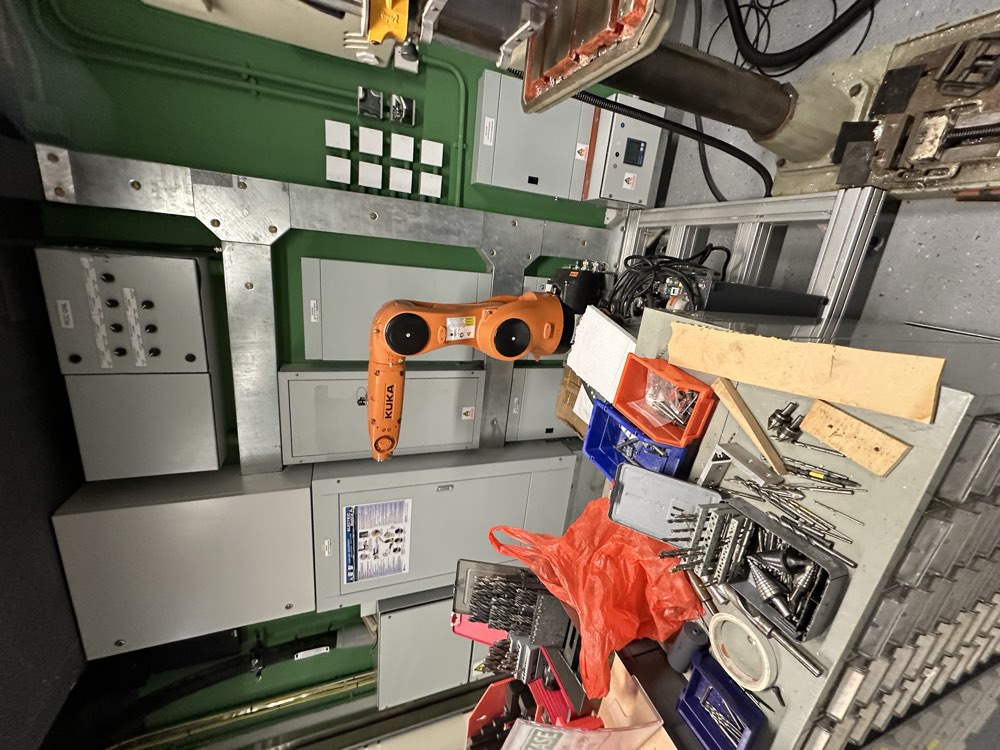
KUKA 6-axis arm05
Not needed for the glasses Self-service · training may be required

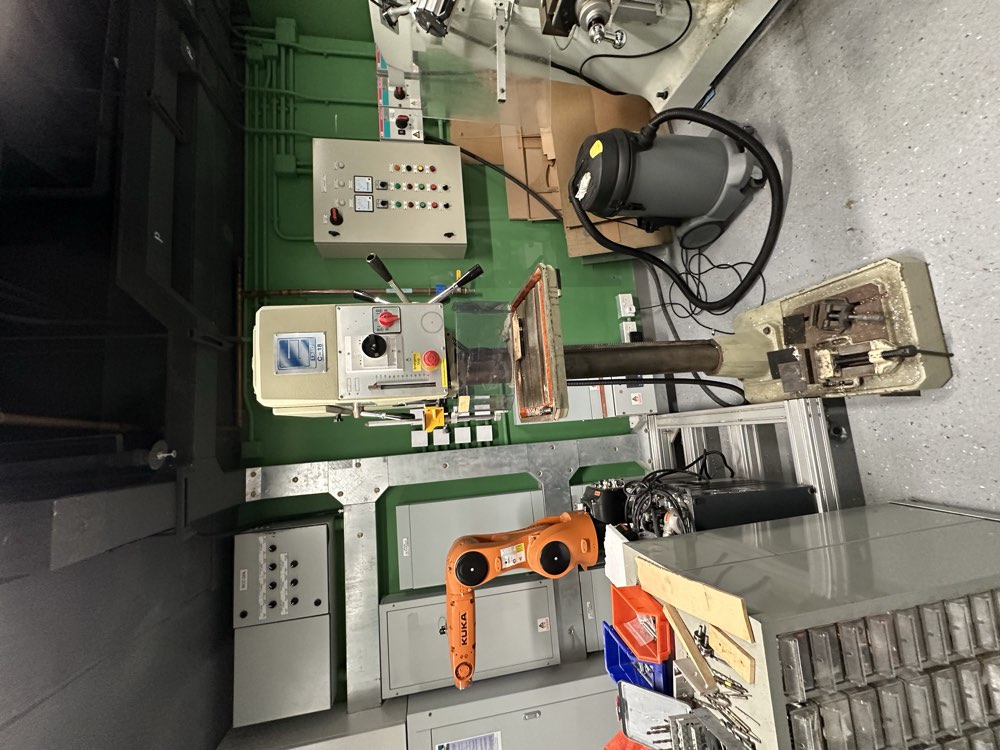
Industrial Robot Arm

KUKA  ·  6-axis arm

A programmable industrial robot arm for learning automation, pick-and-place, and robotic tasks. It's the centre's signature machine.

For the glassesFor robotics projects and automation demos — not part of building the glasses.
🛡 Safety & PPEStay outside its reach when powered. Training required before use; always know where the emergency stop is.
🧰 What to prepareA clear task or program and staff sign-off. Never enter its work zone while it's moving.
💡 In plain wordsAn industrial arm repeats precise movements exactly — the heart of factory automation.
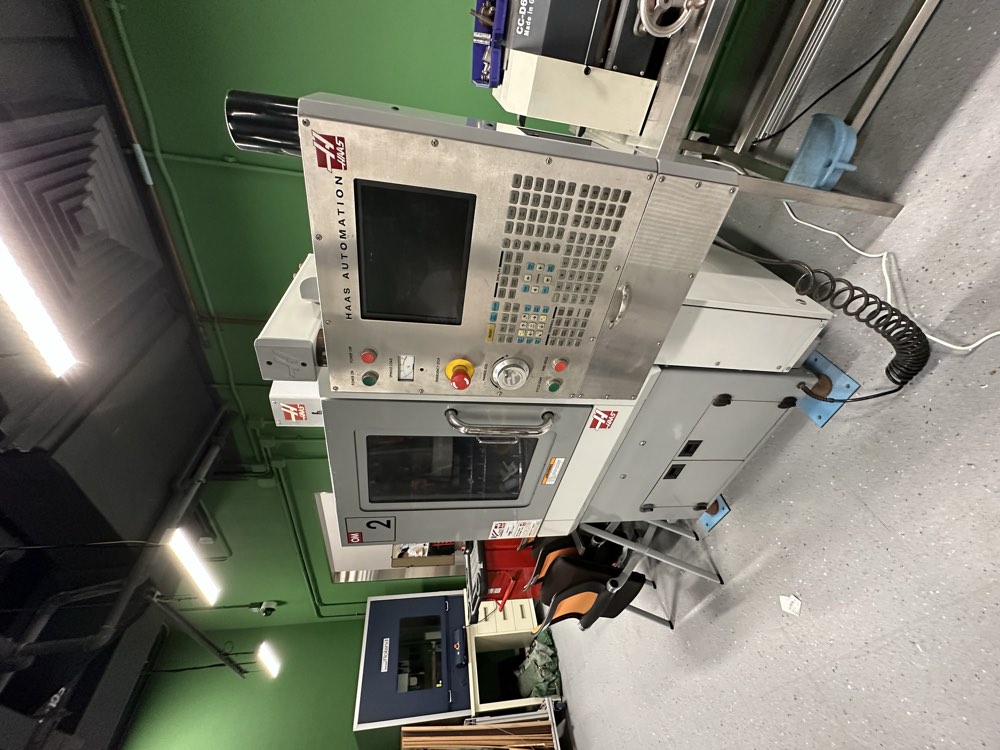
Haas Automation Office Mill (OM-2)06
Situational Self-service · training may be required

CNC Milling Machine

Haas Automation  ·  Office Mill (OM-2)

A computer-controlled mill that carves precise parts from a block of metal or plastic, following your file automatically.

For the glassesMachine precise metal jigs, fixtures, or a mould from your CAD file.
🛡 Safety & PPETraining required. Keep the door shut while cutting, never reach toward moving tools, and wear eye protection.
🧰 What to prepareA CAM program (made in SolidCAM), the right cutting tool, and a securely clamped block.
💡 In plain wordsCNC means the computer drives the cutter, so complex parts come out identical every time.
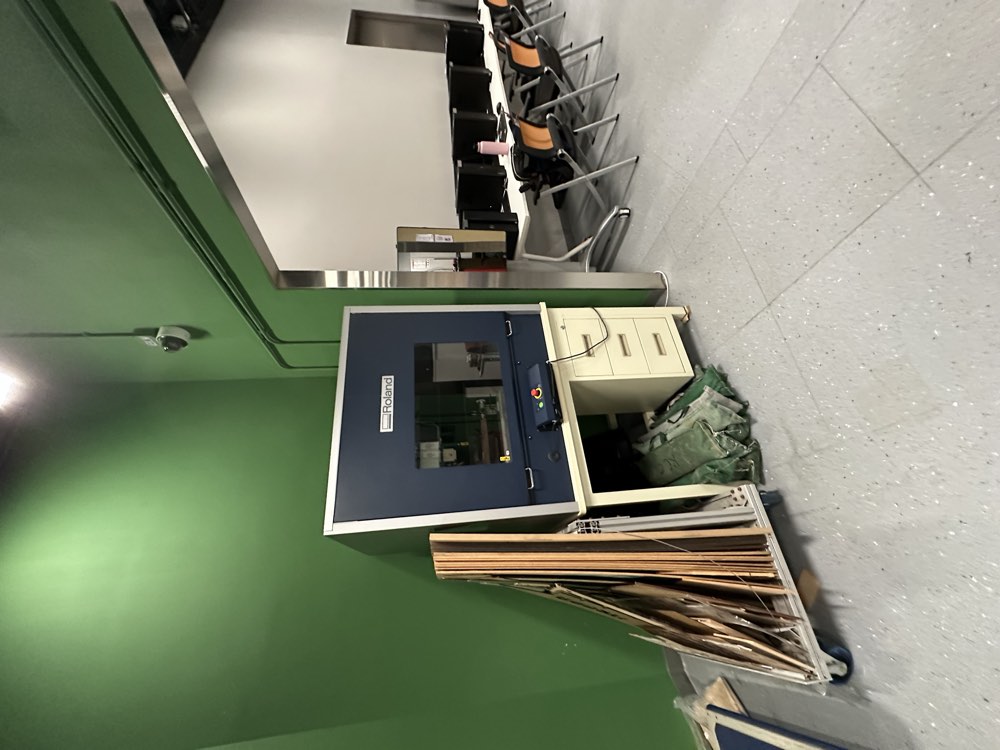
Roland Desktop mill07
Situational Self-service · training may be required

Benchtop CNC Mill

Roland  ·  Desktop mill

A desktop-sized CNC mill for smaller, finer milling and engraving jobs.

For the glassesSmaller computer-controlled milling for compact parts and mould-making.
🛡 Safety & PPETraining required. Keep clear of the spinning tool and wear eye protection.
🧰 What to prepareA CAM file sized for the small work area, and a suitable material.
💡 In plain wordsSame idea as the big CNC, just bench-sized for small, detailed parts.
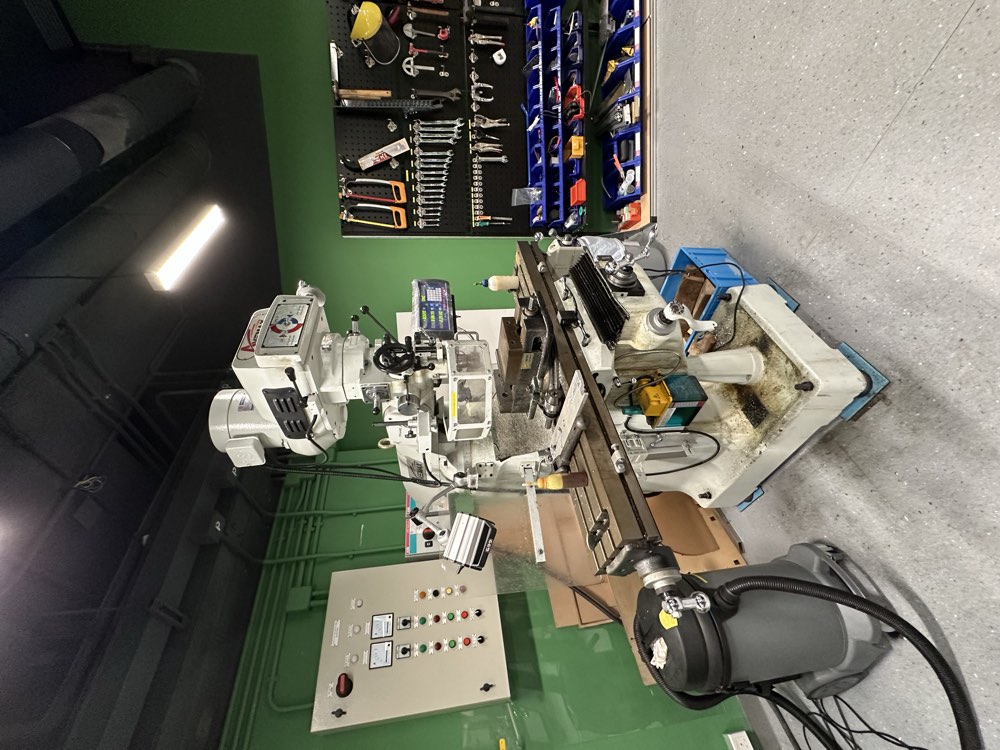
Turret mill Knee-type08
Not needed for the glasses Self-service · training may be required

Milling Machine (manual)

Turret mill  ·  Knee-type

A manual milling machine: you turn the handwheels by hand to cut flat faces, slots, and holes in metal.

For the glassesHand-operated metal milling — for metal fixtures, not the glasses themselves.
🛡 Safety & PPETraining required. Tie back hair and sleeves, wear eye protection, and clear metal chips with a brush — never your hand.
🧰 What to prepareA clamped metal workpiece, the right cutter, and your target dimensions.
💡 In plain wordsMilling removes metal with a spinning cutter to shape a solid block.
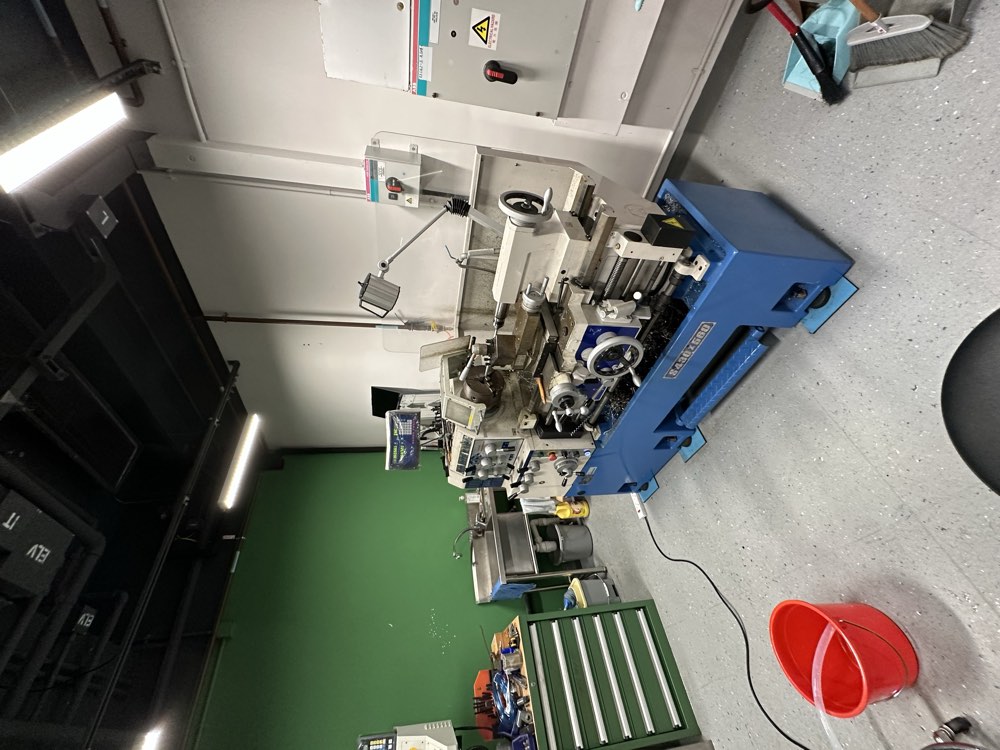
Engine lathe Gap-bed09
Not needed for the glasses Self-service · training may be required

Metal Lathe

Engine lathe  ·  Gap-bed

A lathe spins a metal bar while a cutting tool shapes it into round parts — rods, shafts, and threads.

For the glassesTurning round metal parts like shafts and pins — not typical for eyewear.
🛡 Safety & PPETraining required. No gloves or loose clothing near the spinning chuck; eye protection; always remove the chuck key before starting.
🧰 What to prepareA metal bar that fits the chuck, and a plan for the diameter and length you want.
💡 In plain wordsThe workpiece spins and a tool shapes it — that's how round metal parts are made.
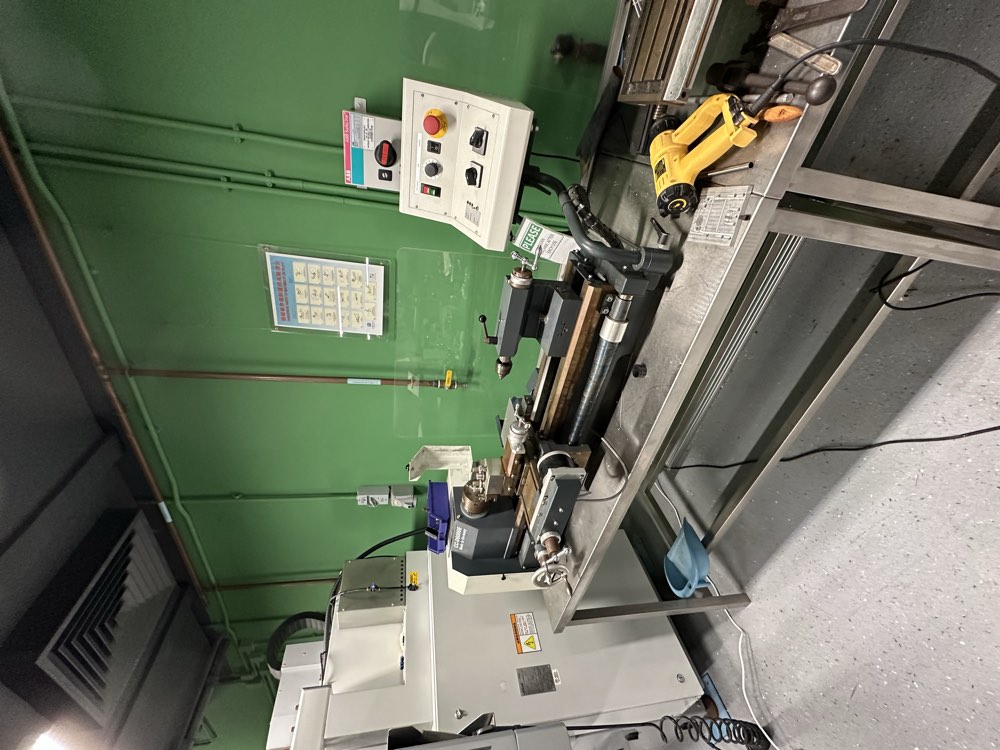
Compact lathe CC-D6000E10
Not needed for the glasses Self-service · training may be required

Benchtop Lathe

Compact lathe  ·  CC-D6000E

A compact precision lathe for small turning jobs.

For the glassesA small lathe for tiny round parts — rarely needed for the glasses.
🛡 Safety & PPETraining required; the same spinning-part rules as the big lathe apply.
🧰 What to prepareA small metal blank and a target size.
💡 In plain wordsA desktop version of the metal lathe, for small parts.
Compact mill CC-FY10E11
Situational Self-service · training may be required

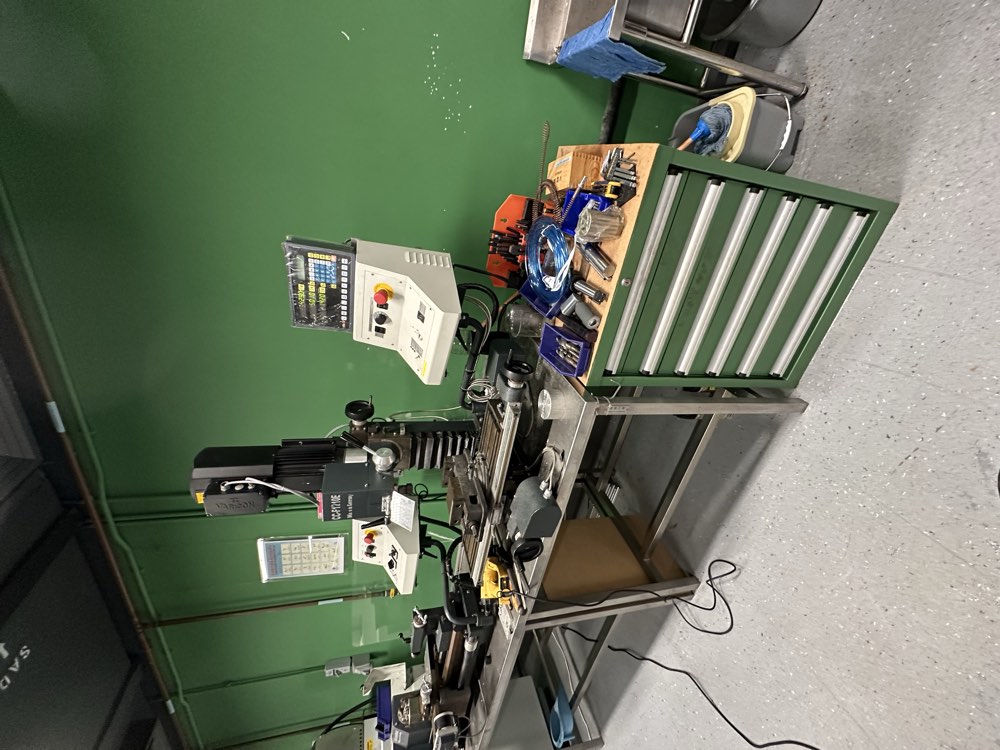
Benchtop Mill / Drill

Compact mill  ·  CC-FY10E

A small combined mill and drill with a digital readout, for accurate holes and light milling.

For the glassesSmall, accurate holes and slots — handy for custom brackets or fixtures.
🛡 Safety & PPETraining required; wear eye protection and clamp the work — never hold it by hand.
🧰 What to prepareA clamped part and the right drill bit or end-mill.
💡 In plain wordsA benchtop machine for accurate holes and light shaping.
Column drill Floor-standing12
Situational Self-service · training may be required

Pillar Drill Press

Column drill  ·  Floor-standing

A standing drill that makes straight, repeatable holes far more accurately than a handheld drill.

For the glassesStraight, accurate holes in brackets, plates, or enclosures.
🛡 Safety & PPEClamp the workpiece (never hold it by hand), wear eye protection, and tie back hair and sleeves.
🧰 What to prepareMark your hole positions and pick the right drill bit.
💡 In plain wordsThe fixed column keeps the drill perfectly straight for clean holes.
STATION 05

Electronics & assembly

The bench and tools for building, soldering, and hand-assembling a working prototype.

2 itemsSelf-service
Aim-TTi · RS PRO CPX400S power supply + RS PRO soldering station13
Core for the glasses Self-service · training may be required

Electronics Bench

Aim-TTi · RS PRO  ·  CPX400S power supply + RS PRO soldering station

A bench power supply to run your board, plus a temperature-controlled soldering station to join electronic parts together.

For the glassesBuild, power, and hand-solder the glasses' circuit board and wiring.
🛡 Safety & PPEThe soldering iron is very hot (~350°C) — use the stand and the fume extractor, and wash your hands after handling solder.
🧰 What to prepareYour board, the components, solder, and the voltage your device needs.
💡 In plain wordsSoldering melts a metal 'glue' to connect electronic parts; the power supply then powers them for testing.
Assorted Cordless drills, drivers, clamps, hand tools14
Core for the glasses Self-service · training may be required

Hand & Power Tools

Assorted  ·  Cordless drills, drivers, clamps, hand tools

A full wall of hand tools plus cordless drills, drivers, and clamps — members can borrow them.

For the glassesThe everyday kit for assembling and finishing a prototype by hand.
🛡 Safety & PPEWear eye protection when cutting or drilling, always use the right tool for the job, and return anything you borrow.
🧰 What to prepareKnow what you're assembling, and bring your parts and fasteners.
💡 In plain wordsSometimes the fastest prototype step is just a screwdriver and a clamp.
For our product

Putting it together: building an AI-glasses prototype

Here's a sensible order to use the RCC to go from an idea to a working pair of glasses you can hold and try — using the machines we've confirmed on site.

A start-to-finish path for the glasses

Most of the build is design, printing, electronics, and assembly. The metal-shop machines come in only if you need custom jigs or fixtures.

1

Design it

Draw the frame in 3D and lay out the circuit board on screen.

CAD workstations (SolidWorks + Altium)
2

Print the frame

Print a real plastic frame and housing overnight, then check how it fits and feels.

3D printers (Ultimaker, Stratasys, Markforged Onyx)
3

Cut flat parts & jigs

Laser-cut acrylic spacers, holding jigs, or a simple packaging mock-up.

Laser cutter (GCC LaserPro X500III)
4

Make fixtures (only if needed)

Machine a metal jig or mould to hold parts precisely during assembly.

CNC mill (Haas OM-2) · drill press
5

Build the electronics

Solder the board, connect the camera and battery, and power it up to check it runs.

Electronics bench (Aim-TTi supply + soldering station)
6

Assemble & finish

Put it all together by hand — screws, clamps, and final fit.

Hand & power tools

Then prove it works: the RCC builds your prototype, but it can't run accredited strength, fatigue, or environmental tests. For that, take it to the Medical Device Testing Lab — see the MDTL beginner's guide.

The bottom line

What the RCC lets you do — and where it stops

The RCC is a place to make things fast: design, print, cut, machine, solder, and assemble in one building. It's a workshop, not a testing lab.

You can do here

  • DESIGN Model the frame in CAD and lay out the PCB (Altium).
  • PRINT 3D-print frames & housings in plastic and carbon-fibre.
  • CUT Laser-cut flat parts, jigs, and mock-ups.
  • MACHINE Mill and turn metal fixtures, moulds, and brackets.
  • BUILD Solder, power, and hand-assemble the electronics.
  • ROBOT Integrate and demo robotics & automation.

Goes elsewhere

  • TEST Strength, fatigue & environmental testing → MDTL.
  • PCB Actual circuit-board fabrication (design here, boards made externally).
  • MASS Mass production & injection moulding.
  • CERT Biocompatibility, safety & regulatory certification.

New here? Two things before you go

1) You'll need to be an RCC member and do the safety training for any machine you want to run. 2) Read the machine's card first — the “before you use it” box tells you what to bring and how to stay safe. When in doubt, email the team; they train first-timers.

About this guide. A beginner-friendly reference put together from HKSTP's public Robotics Catalysing Centre pages (Prototyping Lab & FlexLab) plus first-hand photos of the workshop. It is not an official HKSTP publication and is not affiliated with or endorsed by HKSTP. The “for the glasses” notes reflect Innospire's own product and are one team's opinion, not lab advice. Only equipment photographed in person is listed; the centre has more, and machine models are identified by sight where no label was visible.

HKSTP Robotics Catalysing Centre · G/F, Building 19W, Science Park · rcc.info@hkstp.org · +852 2629 6918